外掛說明
Remita Woocommerce Payment Plugin allows you to accept payments on your Woocommerce store via debit/credit cards (Visa, Mastercard, Verve) and Wallets (eTranzact, PocketMoney). To start implementation for accepting payments on your website, please logon to your Remita Profile to:
- Get your public/Secret Keys Click Here to Sign-Up if you don’t have a profile yet and
- Provide a URL that Remita will send your payment notifications to
This is a Remita payment Plugin for Woocommerce developed in Nigeria.
Remita is a multi-channel funds collection platform that supports all types of Biller and merchant organizations. It can be used by educational institutions, insurance companies, e-commerce sites, utility companies, clubs and associations, religious organizations, Government agencies, Local and State Governments etc. to collect various types of fees, charges, dues and revenue.
Remita Woocommerce Payment Plugin allows you to accept payment on your Woocommerce store from Internet Banking, Bank Branches, Nigeria-issued Visa Card, Mastercard and Verve Cards and Internationally-Issued Master & Visa Cards.
You need a profile on Remita to start accepting payments on your website using this plugin. You can click here to sign-up quickly if you do not have a profile yet.
With this Remita Woocommerce Payment Gateway plugin, you will be able to accept the following payment methods in your shop:
- MasterCards
- Visa Card
- Verve Cards
- Internet Banking
- Bank Branches
- Paga
- POS
- eNaira
- Bank Transfer
- Remita Account Transfer
Note
Implementing this plugin accepts payments into Nigerian Naira (NGN) accounts only.
Plugin Features
- Accept payment via Visa Cards, Mastercards, Verve Cards and ewallets (eTranzact, PocketMoney etc.)
- Seamless integration into the WooCommerce checkout page.
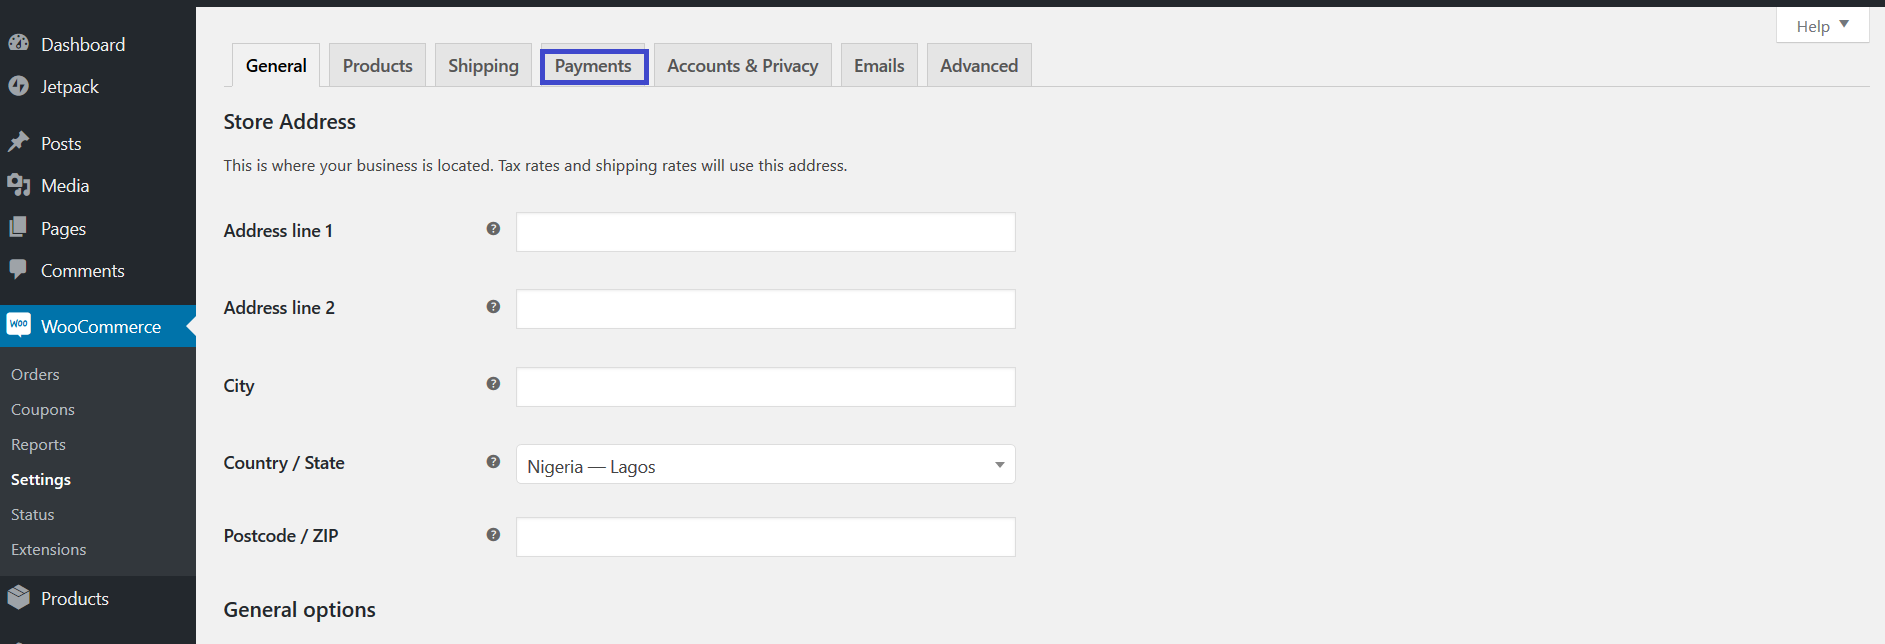
- Add Naira currency symbol. To select it go to go to WooCommerce > Settings from the left hand menu, then click General from the top tab. From Currency select Naira, then click on Save Changes for your changes to be effected.
Suggestions / Feature Request
If you have suggestions or a new feature request, feel free to get in touch with us through website here
螢幕擷圖

WordPress Activate Plugin Page

Wooocommerce Settings Page

Wooocommerce Payment Gateway Setting Page

Selecting Remita Payment Gateway method on Woocommerce Payment Settings Page

Remita Payment Gateway Plugin Page

Woocommerce Checkout Page

Wocommerce PayNow Page

Remita Inline Popup Page

Remita Inline Success Page
安裝方式
Automatic Installation
- Login to your WordPress Admin area
- Go to “Plugins > Add New” from the left hand menu
- In the search box type “Remita Woocommerce Payment Gateway”
- From the search result you will see “Remita Woocommerce Payment Gateway” click on “Install Now” to install the plugin
- A popup window will ask you to confirm your wish to install the Plugin.
Note:
If this is the first time you’ve installed a WordPress Plugin, you may need to enter the FTP login credential information. If you’ve installed a Plugin before, it will still have the login information. This information is available through your web server host.
- Click “Proceed” to continue the installation. The resulting installation screen will list the installation as successful or note any problems during the install.
- If successful, click “Activate Plugin” to activate it, or “Return to Plugin Installer” for further actions.
Manual Installation
- Download the plugin zip file
- Login to your WordPress Admin. Click on “Plugins > Add New” from the left hand menu.
- Click on the “Upload” option, then click “Choose File” to select the zip file from your computer. Once selected, press “OK” and press the “Install Now” button.
- Activate the plugin.
- Open the settings page for WooCommerce and click the “Payment Gateways,” tab.
- Click on the sub tab for “Remita Payment Gateway”.
- Configure your “Remita Payment Gateway” settings. See below for details.
Configure the plugin
To configure the plugin, go to WooCommerce > Settings�from the left hand menu, then click “Payment Gateways” from the top tab. You should see “Remita Payment Gateway” as an option at the top of the screen. Click on it to configure the payment gateway.
You can select the radio button next to the Remita Payment Gateway from the list of payment gateways available to make it the default gateway.
- Enable/Disable – check the box to enable Remita Payment Gateway.
- Title – allows you to determine what your customers will see this payment option as on the checkout page.
- Description – controls the message that appears under the payment fields on the checkout page. Here you can list the types of cards you accept.
- Public Key – enter your Remita Public Key.
- Private Key – enter your Remita Private Key.
- Environment – Select Test or Live.
- Click on Save Changes for the changes you made to be effected.
常見問題集
-
What Do I Need To Use The Plugin
-
- You need to have Woocommerce plugin installed and activated on your WordPress site.
- You need to register an account on Remita
使用者評論
參與者及開發者
變更記錄
1.0.0
- First release
1.2.0
- Fixes the payment option error.
2.0
- Inline payment.