外掛說明
WordPress Manage TinyMCE Editor allows you to add buttons to WordPress TinyMCE editor.
Using the plugin you will be able to add the following buttons to the default WordPress visual editor:
Cut
Copy
Paste
Source code
Font family selector
Font size selector
Style selector
Background color
Empty document
Superscript
Subscript
Select the desired buttons in the plugin’s settings page and they will be available in TinyMCE.
螢幕擷圖
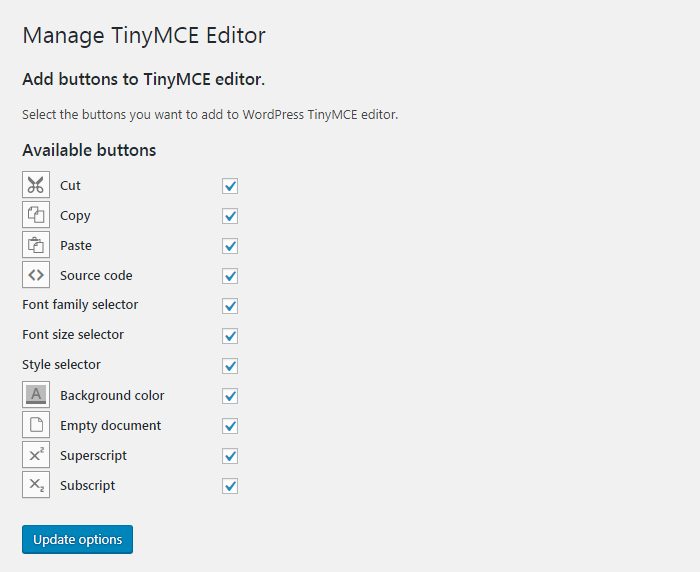
Add buttons to Worpress TinyMCE visual editor in the plugin's settings page. 
Wordpress TinyMCE editor with added buttons.
安裝方式
Automatic installation
- Go to Plugins > Add New > Upload and select the .zip file from your hard disk
- Click the “Install now” button
- Activate the plugin through the ‘Plugins’ menu in WordPress
Manual installation
- Upload the plugin folder to the
/wp-content/plugins/directory via ftp - Activate the plugin through the ‘Plugins’ menu in WordPress
常見問題集
- Installation Instructions
-
Automatic installation
- Go to Plugins > Add New > Upload and select the .zip file from your hard disk
- Click the “Install now” button
- Activate the plugin through the ‘Plugins’ menu in WordPress
Manual installation
- Upload the plugin folder to the
/wp-content/plugins/directory via ftp - Activate the plugin through the ‘Plugins’ menu in WordPress
- How do I add buttons to WordPress TinyMCE visual editor?
-
Once the plugin is installed and activated, from your dashboard navigate to “Settings > Manage TinyMCE Editor”, check the buttons you want to add and save.
使用者評論
2022 年 3 月 22 日
...And has being doing so for 5 years, without upgrades!
Congrats!
參與者及開發者
變更記錄
1.0.0
- First release